Updating Old Swimming Pool Light Niches for New LED Fixtures
Upgrading old swimming pool lights to modern-day LED fixtures is one of those projects that looks basic in brochure images and gets made complex the moment you pull the very first light out of its niche. The electrical wiring is older than the property owner idea, the channel is weak, the metal particular niche reveals rust, and sometimes the plaster team has actually buried half the face ring in coating material.
Handled well, a light upgrade can transform a pool, lower energy use, and get rid of persistent leak olympic-size pool builder factors. Dealt with poorly, it can present new leakages, produce electric problems, and wreck an excellent resurfacing work. The difference typically comes down to how very carefully you assess and adapt the existing pool light specific niches prior to you touch plaster, waterline tile, or coping.
What adheres to is a useful, field-based look at just how to approach old particular niches when the goal is a tidy LED retrofit that will endure years of usage and future renovations.
Why old specific niches are a weak spot in a contemporary LED upgrade
Most pools built prior to the LED age were made around large, metal, niche-style fixtures. These particular niches were set right into pneumatically applied concrete such as gunite or shotcrete, after that connected right into the pool bond beam and shell. The electrical code at the time was various, the assumptions for life span were shorter, and no one was thinking of compact LED containers, color-changing chauffeurs, or low-voltage transformer locations.
Modern LED components are smaller, lighter, and usually designed to set up into either existing niches or proprietary placing bases. That sounds convenient until you challenge indoor commercial pools one of these facts:
- The old avenue is undersized or partly collapsed.
- The steel specific niche has rusted and is now a leakage path into the shell.
- The bonding lug is missing out on or rusted beyond reliability.
- The niche is established too deep behind thick plaster, PebbleTec, or an additional subjected pebble coating, so the LED trim ring does not rest flush.
- The inside of the particular niche was never properly sealed where it meets the covering, and movement in the pool structure has opened gaps.
If you just think of the fixture and disregard the problem of the particular niche and surrounding framework, you can end up going after enigma leaks or flickering lights through a new finish.
Understanding what you currently have
Before reviewing just how to upgrade, it helps to understand the typical niche configurations located in older pools.
Many mid‑century and late‑20th‑century swimming pools utilized stainless-steel or galvanized steel specific niches. They were almost always installed in gunite or shotcrete, with the border of the particular niche smudged in when the covering was finished. On vinyl‑liner swimming pools you will certainly see plastic particular niches, but also for the majority of concrete property pools, metal dominated.
The particular niche is not simply an installing pail. It is a junction point in between water, electrical power, and structure. The channel that feeds it may be inflexible steel, PVC, or a mix, relying on when the swimming pool was built. The particular niche must have a bonding lug bolted or bonded on, tying back into the swimming pool's total bonding grid. Over decades, any of the complying with can occur:
Water can move behind the niche and right into the shell if the original seal was inadequate or if the covering has actually cracked.
Metal can pit and rust, particularly around the conduit access and mounting screw points.
Original caulks or hydraulic concrete packaging around the specific niche boundary can fail as the covering moves.
Occasionally, later improvements hide the specific niche deeper under brand-new plaster or an additional quartz aggregate surface or pebble system. I have seen swimming pools where 2 or 3 generations of resurfacing had actually narrowed the light opening to the factor where the face ring almost sat behind the aircraft of the coating. That complicates LED upgrades.
So the initial task on any kind of LED retrofit job is investigator work.
A practical pre‑assessment before you buy fixtures
Before you value the task or choose a particular LED design, place your hands and eyes on the existing hardware. An easy field assessment protects against half of the awful surprises.
Use this brief list to guide that initial visit:
Business Name: Adams Pool SolutionsAddress: 3675 Old Santa Rita Rd, Pleasanton, CA 94588, United States
Phone: (925)-828-3100
People Also Ask about Adams Pool Solutions
What services does Adams Pool Solutions provide?
Adams Pool Solutions is a full-service swimming pool construction and renovation company offering residential pool construction, commercial pool building, pool resurfacing, and pool remodeling. Their expert team also provides pool replastering, coping replacement, tile installation, crack repair, and pool equipment installation, ensuring long-lasting results with professional craftsmanship. Learn more at https://adamspools.com/.
Where does Adams Pool Solutions operate?
Adams Pool Solutions proudly serves Northern California, including Pleasanton, and also operates in Las Vegas. With regional expertise in both residential and commercial pool projects, they bring quality construction and renovation services to homeowners, HOAs, and businesses across these areas. Find them on Google Maps.
Does Adams Pool Solutions handle commercial pool projects?
Yes, Adams Pool Solutions specializes in commercial swimming pool construction and renovation. Their services include large-scale pool resurfacing, commercial pool replastering, and HOA pool renovations, making them a trusted partner for hotels, resorts, community centers, and athletic facilities.
Why choose Adams Pool Solutions for pool renovation?
Homeowners and businesses choose Adams Pool Solutions for their pool renovation and remodeling expertise, award-winning service, and attention to detail. Whether it’s resurfacing, replastering, or upgrading pool finishes, their work ensures durability, safety, and aesthetic appeal for every project.
What awards has Adams Pool Solutions received?
Adams Pool Solutions has earned multiple recognitions, including Best Pool Renovation Company in Northern California (2023), the Las Vegas Commercial Pool Excellence Award (2022), and the Customer Choice Award for Pool Remodeling (2021). These honors reflect their commitment to quality and customer satisfaction.
What are the benefits of working with Adams Pool Solutions?
Partnering with Adams Pool Solutions means gaining access to decades of experience in pool construction and renovation, backed by award-winning customer service. Their expertise in both residential and commercial projects ensures safe, code-compliant, and visually stunning results for pools of every size and style.
How can I contact Adams Pool Solutions?
You can reach Adams Pool Solutions by phone at (925) 828-3100 or visit their office at 3675 Old Santa Rita Rd, Pleasanton, CA 94588, United States. Their business hours are Monday to Friday, 8 AM to 4 PM. More details are available at https://adamspools.com/.
Is Adams Pool Solutions active on social media?
Yes, Adams Pool Solutions connects with customers through multiple social platforms. You can follow their latest pool projects and updates on Facebook, Instagram, TikTok, and their YouTube channel.
If you are already intending a major restoration, this evaluation connections directly right into the total pool covering prep, waterline floor tile work, and dealing substitute sequence.
How particular niche upgrades suit full pool renovations
Light niche work seldom takes place alone. In method, several LED upgrades become part of a more comprehensive renovation that may include brand-new waterline ceramic tile, travertine coping, or a fresh interior such as Hydrazzo, Ruby Brite, PebbleTec, or a quartz accumulation finish.
The condition of the pool bond light beam is vital. If the bond beam of light has cracked or spalled near the light line, that movement will emphasize the niche and its interface with the covering. In those situations, you may be at the same time doing gunite resurfacing or local shotcrete repair service while likewise dealing with the specific niche. Any kind of structural fixing needs to be total and correctly healed prior to you count on a new waterproofing membrane or finish around the light.
Waterline floor tile job likewise touches the specific niche location. On older swimming pools, glass mosaic tile is in some cases expanded down and around the niche opening as a decorative attribute. When getting rid of old floor tile, the substratum scarification process and ceramic tile underlayment fixing can reveal gaps or old patch products around the particular niche. That is the moment to address those spaces and apply compatible waterproofing products rather than merely tiling back over low substrate.
Coping choices matter too. Travertine coping, bullnose block, or actors coping rocks all transfer different lots and thermal activities right into the bond beam of light. A cantilevered coping gathered area acts in a different way from established rock units, and motion at the beam can telegram as cracks near light niches and skimmer throats. If you see a pattern of cracks from the dealing edge down towards the specific niche, take time to assess the bond beam and take into consideration whether skimmer throat repair service, mastic joint substitute, or Deck‑O‑Seal revival is warranted. Fixing those issues now makes the LED upgrade even more durable.
Interior surface work ties directly right into niche depth and placement. Fresh plaster, revealed stone finishes, or specialized surface areas like Hydrazzo require a clean, properly prepped niche and bordering area. That normally suggests some mix of acid etching, muriatic acid clean, mechanical grinding, and substratum scarification to create a strong bond plane. Any weak plaster beside the niche that seems hollow or reveals plaster delamination need to be eliminated prior to you generate a brand-new LED fixture.
Sometimes on older swimming pools the white line plaster around the ceramic tile, or a previous spot around the specific niche, remains in visibly worse condition than the rest of the shell. If you are not totally resurfacing, a minimum of support these areas with suitable patch materials and, where ideal, a slim waterproofing membrane layer designed for submerged conditions.
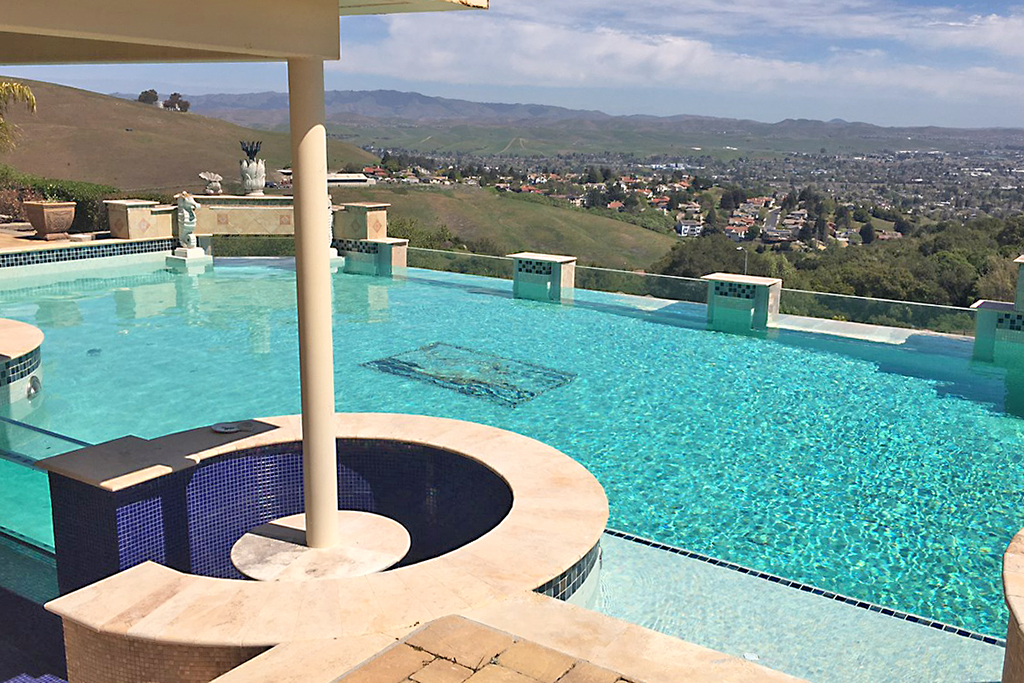
Our commercial pool construction near the Tesla Factory showcases Adams Pools’ commitment to precision engineering.
Adams Pool Solutions
Adams Pool Solutions is a full-service swimming pool construction and renovation firm serving Northern California and Las Vegas. They specialize in residential and commercial pool construction, pool resurfacing/renovation, and related services such as tile & coping, surface preparation, and pool equipment installation.
(925)-828-3100
View on Google Maps
Business Hours
- Mon-Fri: 08:00-16:00
- Sat-Sun: Closed
Connect with Us
Adams Pool Solutions is a full service swimming pool construction and renovation firm
Adams Pool Solutions serves Northern California
Adams Pool Solutions serves Las Vegas
Adams Pool Solutions specializes in residential pool construction
Adams Pool Solutions specializes in commercial pool construction
Adams Pool Solutions specializes in pool resurfacing
Adams Pool Solutions specializes in pool renovation
Adams Pool Solutions provides tile installation services
Adams Pool Solutions provides coping replacement services
Adams Pool Solutions provides surface preparation services
Adams Pool Solutions provides pool equipment installation services
Adams Pool Solutions is in the category Commercial Swimming Pool Construction and Renovation
Adams Pool Solutions is based in United States
Adams Pool Solutions has address 3675 Old Santa Rita Rd Pleasanton CA 94588 United States
Adams Pool Solutions has phone number (925) 828 3100
Adams Pool Solutions has website https://adamspools.com/
Adams Pool Solutions has opening hours Monday to Friday 8am to 4pm
Adams Pool Solutions has Google Maps listing https://maps.app.goo.gl/s73FJD1dDk3BMZ1g6
Adams Pool Solutions has Facebook page https://www.facebook.com/adamspools/
Adams Pool Solutions has TikTok profile https://www.tiktok.com/@adams_pool_solutions?lang=en
Adams Pool Solutions has Instagram profile https://www.instagram.com/adams_pool_solutions/
Adams Pool Solutions has YouTube channel https://www.youtube.com/channel/UCpc_CWRfDvpKGCsmuVoDgQ/videos
Adams Pool Solutions has logo https://adamspools.com/wp-content/uploads/2021/03/logo1.png
Adams Pool Solutions offers pool renovation
Adams Pool Solutions offers pool remodeling
Adams Pool Solutions offers pool replastering
Adams Pool Solutions offers pool resurfacing
Adams Pool Solutions offers pool tile installation
Adams Pool Solutions offers commercial pool resurfacing
Adams Pool Solutions offers commercial pool construction
Adams Pool Solutions offers HOA pool renovation
Adams Pool Solutions offers pool crack repair
Adams Pool Solutions was awarded Best Pool Renovation Company in Northern California 2023
Adams Pool Solutions won Las Vegas Commercial Pool Excellence Award 2022
Adams Pool Solutions was recognized with Customer Choice Award for Pool Remodeling 2021
Every decision here has to do with sequencing. You do not want to fight with specific niche positioning after the brand-new waterline floor tile is set, nor cut into a new quartz aggregate or PebbleTec finish simply to repair a drip behind a light.
Common particular niche upgrade situations and just how to take care of them
After enough projects, you start to see the very same patterns repeat, each with its very own best practice.
Large metal specific niche to compact LED fixture
This is the most common instance. A full‑size metal specific niche, usually 10 or 11 inches in diameter, is being updated to a small LED. Several LED producers supply adapter rings or brackets that enable small components to place securely in the old housing.
Key reasoning calls below consist of:
Whether the particular niche is structurally audio sufficient to recycle. Hefty pitting, rust-through, or warped installing factors are red flags.
Whether the conduit access is water tight. Any kind of indicator of leakage behind the specific niche asks for cleansing, then resealing with a suitable hydraulic concrete or polymer-modified repair service compound created for submerged use.
How deep the niche sits relative to the existing or planned finish. In some cases you might need to grind back old coating or feather in brand-new material to make certain the LED trim ring sits flush.
If the niche meets those requirements, an adapter-based LED retrofit can be really reliable. Where it does not, replacement or more hostile fixing is the far better long-term choice.
Damaged or small conduit
LED cables are typically thinner than the old incandescent cords, yet the problem is seldom size alone. Old inflexible steel conduit might have rusted inside, and older PVC can deform or crush at bends near the shell.
If a pull test recommends obstruction, do not compel it and risk reducing the insulation on the brand-new cord. Alternatives include:
Blowing a fish line using a vacuum cleaner setup from the junction box side.
Running a versatile gopher or fiberglass rod, then gently working obstructions loose.
In worst cases, trenching or reducing to install a brand-new avenue run, which may include trenching with decking and reworking mastic joints or concrete patching around cantilevered coping edges.
Whenever channel job becomes invasive, it is wise to coordinate with any kind of scheduled mastic joint substitute, Deck‑O‑Seal installation, or deck resurfacing. Integrating these disturbances right into one stage conserves the property owner money and reduces frustration.
Leaking particular niche perimeter
Sometimes, the home owner calls regarding a "strange" water loss and the wrongdoer ends up being the niche. Color checking around the niche perimeter is a quick way to confirm.
If leaks are identified, draining listed below the light and getting rid of the old component allows you analyze the joint where the specific niche satisfies the shell. That user interface can typically be re‑established making use of hydraulic cement, careful surface preparation, and, where layout permits, a slim waterproofing membrane transition that ties the metal or plastic specific niche to the bordering concrete or shotcrete.
It is necessary not to bridge moving splits with stiff materials. If the bond beam of light or covering reveals active motion, address that structurally initially. Once secure, the specific niche border repair service stands a much better opportunity of staying watertight.
Integrating LED particular niche collaborate with covering prep and finishes
On a full resurfacing job, niche work is one step in a longer chain. Done right, it vanishes visually right into the new coating and remains that way.
Shell prep near the niche typically includes cracking back loosened or hollow product, grinding the surface area to appear substrate, and after that carrying out targeted repair services. Substratum scarification near the light needs to be complete sufficient that the brand-new surface, whether PebbleTec, Diamond Brite, revealed stone, or white line plaster, bonds firmly without linking over voids.
Many installers like to float a limited, dense base coat around the particular niche, specifically where previous patching looks suspect. That base can be Portland-based with polymers for versatility, provided it works with the interior surface system and any type of waterproofing membrane layer specified.
For attractive ceramic tile around lights, especially with glass mosaic floor tile bands that dip around the particular niche opening, floor tile underlayment monotony and honesty issue. Spaces telegraph as broken tile and failed grout. Excellent cement color matching and format planning allow the light to really feel aesthetically incorporated instead of an uncomfortable cutoff in the pattern.
If a muriatic acid wash or broader acid etching action is part of the covering preparation or cleanup, shield new LED components meticulously. I favor to install final fixtures after hostile chemical actions are done, making use of blank plates or momentary covers over the particular niche opening during prep.
A step‑by‑step series for a common LED retrofit
Each task differs, yet the following sequence works accurately on many concrete pool renovations where particular niches are serviceable and the covering is structurally sound.
The critical technique below is not to rush steps three and 4. If niche repair services and shell prep are hurried, the most effective LED fixture worldwide will certainly not rescue the job.
Electrical, bonding, and security considerations
Upgrading to LED does not change the basics of swimming pool electrical safety and security. All components should be provided for swimming pool usage, installed in accordance with the National Electric Code as embraced in your territory, and matched to suitable transformers and controls.
Older installations often utilized line‑voltage lights with bonding and grounding practices that would certainly not pass evaluation today. When you are already opening up junction boxes, replacing conduits, and dealing with new LED chauffeurs, it is smart to bring everything up to current requirements as opposed to just swapping fixtures.
Basic but frequently overlooked factors consist of:
Confirming that junction boxes are located and installed at correct heights over the deck and waterline, with appropriate water drainage and easily accessible covers.
Ensuring continuous bonding between the specific niche, enhancing steel, deck steel, handrails, and any steel components such as stainless waterline trim or metal skimmer lids.
Matching LED power level and voltage to transformer ability, and preventing blending incompatible brand names on the same control circuit if they are expected to integrate shades or patterns.
Modern controls, specifically those integrated right into automation systems, include intricacy. Some LED systems tolerate long wire runs far better than others. When niches are much from the devices pad, take notice of voltage drop and signal stability, especially with low‑voltage RGB fixtures.
Dealing with challenging coatings and looks around lights
One of the repeating grievances after a light upgrade is not concerning capability at all. It is about how the light searches in the context of the new finish.
On a smooth white plaster swimming pool, tiny distinctions in ring deepness or trim ring shade are much less evident. On a high-end Hydrazzo surface, a dark exposed pebble surface, or a pool clothed with strong glass mosaic tile bands, the light comes to be even more of a layout element.
A few useful visual factors to consider:
On darker finishes, stainless trim rings can attract attention in a way some property owners do not like. Lots of LED manufacturers offer tinted or paintable trims, which you can coordinate with waterline floor tile and grout shade matching decisions.
Thick aggregate surfaces like PebbleTec or Diamond Brite change exactly how strongly light shows off the surface area. Brighter or wider-spread LEDs may be required to stay clear of erratic illumination in deep ends, especially in older pools with uncommon shapes.
If you are remodeling coping as part of the task, specifically with brand-new travertine coping or cantilevered coping, think about night sightlines. Glare from lights put also near to seating benches, tanning ledges, or health facility spillovers can be aggravating. Occasionally transferring a niche during a larger shell or bond beam alteration is worth the added complexity.
Where skimmer throat repair service or ceramic tile adjustment is taking place, you can seize the day to harmonize aesthetic lines to ensure that lights, ceramic tile bands, skimmers, and steps feel deliberate as opposed to random.
When substitute particular niches or shell job are justified
Not every specific niche ought to live one more life as an LED host. Certain problems warrant more aggressive treatment, even if that broadens the scope and price of the job.
Examples consist of:
Niches with severe deterioration at structural factors or around the avenue entry.
Shell splits radiating from the niche that suggest past movement or continuous architectural issues.
Evidence of recurring leakages behind the particular niche, particularly when combined with movement at the pool bond light beam or adjacent coping.
Situations where multiple layers of previous plaster or finish have actually hidden the niche to the point that risk-free and flush LED installment would require high-risk elimination of too much surrounding material.
In these instances, planned local shotcrete repair work, partial gunite resurfacing, and even cutting out and changing the niche itself can be one of the most sincere and long lasting alternative. This is likewise when a full pool plumbing pressure test, careful evaluation of electric and bonding strategies, and coordination with architectural engineers or knowledgeable covering professionals pays off.
Replacing a niche is intrusive but not tragic if planned together with other major work, such as complete indoor resurfacing, waterline floor tile substitute, and dealing repair. House owners commonly appreciate frank recommendations below. It is far better to explain why a deeper fixing now protects against chronic leaks, electrical call-backs, and coating failings than to assure a straightforward swap and expect the best.
Final thoughts on preparing an LED specific niche upgrade
Upgrading old swimming pool light specific niches for new LED fixtures is less regarding the shiny light and more regarding valuing just how water, framework, and power satisfy inside the covering. When you approach the particular niche as part of a broader system that consists of the pool bond light beam, waterline tile, dealing, interior surface, and remote tools, choices end up being clearer.
Careful evaluation, realistic discussion with the house owner concerning scope, and disciplined sequencing with various other work such as skimmer throat fixing, mastic joint replacement, Deck‑O‑Seal, and interior refinishing established the phase for a trouble‑free outcome. The actual installation of the LED fixture is the easy component when whatever underneath and around it has actually been attentively addressed.
Done right, the lights go away throughout the day, disclose the surface at night, and stay completely dry where they should be. That is the genuine mark of a successful specific niche upgrade.