Smoothing Subjected Stone Complete Changes at Actions and Benches
Rough shifts at actions and benches are one of the leading convenience grievances on subjected pebble coating pools. People anticipate a bit of appearance on the floor. They do not expect to skin their toes where a bench meets the wall or catch a swimwear on the nosing of a step.
From a home builder's viewpoint, those changes are likewise school swimming pool builder where most callbacks begin. Hollow spots along the swimming pool bond beam, cracking at the bench edge, hairline fractures at the action riser, sharp lines where PebbleTec satisfies white line plaster or waterline ceramic tile - all of it tends to show up at breaks in geometry. Fortunately is that with thoughtful prep and the appropriate materials, you can make those transitions comfortable without sacrificing durability.
This is a deep study how professionals approach smoothing revealed pebble finish transitions at actions and benches, both on new tasks and renovations.
Why step and bench changes are constantly the problem spots
Whenever I walk a pool to assess a harsh coating issue, I go right to three places: the bench fronts, the top step, and the interface at the waterline ceramic tile and coping stones. That is where every little thing intersects: various angles, different products, transforming densities, and normally various crews on different days.
Several elements conspire to make these locations more difficult to end up:
Geometry changes. Straight floors are very easy to trowel and subject. A step edge or bench nose has vertical, straight, and usually a little span. Preserving constant subjected pebble texture around that span is not trivial.
Material changes. The point where a revealed stone surface dies into glass mosaic ceramic tile, travertine coping, bullnose block, or a white line plaster band is hardly ever an easy butt joint. Thickness, texture, and absorption modification at that line.
Labor sequencing. Action and bench shaping occurs throughout pneumatically used concrete, whether gunite resurfacing or new shotcrete. The plaster or PebbleTec team normally arrives weeks or months later on. If the covering and bond light beam geometry are unclean, the finisher is forced to cheat with material thickness.
Movement and anxiety. Steps and benches see even more thermal biking, foot traffic, and impact than the deep floor. Any kind of weak point at those joints appears very early: plaster delamination, broke edges, split grout, or peeling off coatings.
Rough shifts are not simply a comfort issue. They are typically a noticeable sign that something in the substrate, prep, or application was hurried or improvised.
Know what you are handling: coatings and their behavior
You can not fix what you do not comprehend. Smoothing a shift in a Hydrazzo swimming pool asks for various techniques than in a conventional revealed pebble surface or a quartz accumulation finish.
Exposed pebble finish, consisting of brands like PebbleTec, relies upon accumulations that are partially installed in concrete paste, after that subjected with a mix of shoveling and cautious water or muriatic acid clean. The stamina originates from the concrete matrix and the rock itself. The structure and smoothness come from timing and the level of exposure.
Quartz aggregate surface and items like Ruby Brite use smaller sized aggregates. They can be finished smoother than a large stone, but they still have bite. These are extra forgiving at action noses due to the fact that the smaller fragment dimension does not stand proud as much at the edge.
Hydrazzo and comparable polished finishes are extra like terrazzo. They are meant to be mechanically ground and brightened, not boldy engraved. You can attain lustrous action shifts, but you should respect density, treating, and polishing sequences. Trying to "soften" a Hydrazzo edge later with acid etching is a rapid path to color melt and mottling.
Traditional marcite or white line plaster bands, usually utilized at the floor tile line or as accent bands at steps, provide a visually tidy transition and a smoother toe feeling. They additionally create an all-natural weak aircraft if the substrate prep is inadequate or if the plaster is applied too thin. When you change from a difficult exposed stone to a soft white plaster right at a nose, that is a typical place for breaking and delamination.
Glass mosaic ceramic tile, waterline ceramic tile, and bullnose floor tile on step risers present an entirely different set of habits. Thermal activity, adjustments in modulus in between floor tile and plaster, and the performance of the ceramic tile underlayment and cement all issue. Obtain those incorrect and you will certainly see hollow sounds, grout cracking, and loosened items right where bare feet land.
Each material has its very own comfort envelope, treatment home window, and density needs. Smoothing shifts without respecting those constraints just conceals issues for a season.
Diagnosing the real trouble at the transition
Before you begin grinding or covering a revealed stone finish to "soothe," require time to identify what is creating discomfort or failure at the transition.
Run your hand, not just your eyes, along:
- Step noses and bench fronts
- Inside corners where the bench returns into the wall
- The line where subjected pebble coating satisfies waterline tile or a white line plaster band
- The edge under travertine coping, bullnose block, or cantilevered coping
- Around swimming pool light particular niches and inside skimmer throats
You are looking for more than roughness. Keep in mind any kind of hollow seeming areas, hairline splits at the user interface, visible separation lines between the finish and the swimming pool bond beam, or sudden action in thickness. A harsh side can be cosmetic, or it can be the beginning of delamination.
Tap questionable areas with a plastic club or the handle of a screwdriver. A tight pebble surface offers a crisp "tick". Hollow areas provide a dead thud and are a red flag that straightforward smoothing will not address.
At skimmers and pool light particular niches, check for gaps around conduit, flexible pipes, or the plastic-to-concrete interface. These are regular leakage and delamination points, and they frequently land near benches or steps.
If you remain in an improvement situation, ask whether a pool plumbing stress test has been performed just recently. Fixing coating problems while a concealed pipes leakage is feeding wetness behind your pebble is a recipe for callbacks.
Shell and substrate initially: you can not brighten your escape of bad geometry
The cleanest step and bench transitions begin long in the past anybody blends plaster. They start with pool covering prep and cautious shaping of the gunite or shotcrete.
On a new covering, that indicates making sure steps and benches are appropriately cut and trued throughout pneumatically applied concrete. Every inch you are off at the shell, you pay for later on in build-up, feathering, or concessions on texture. A 10 mm hump at a bench face does not seem like a lot, up until you try to bend a 3 to 6 mm surface over it.
On a remodel, particularly gunite resurfacing projects, you often inherit poor geometry and have to remedy it. That is where substrate scarification and patching approach matter. Grind the old surface aggressively at action and bench sides so your brand-new finish has something to attack into. Plume out ridges rather than merely adding product on top.
When you need to re-form a cracked bench front or a busted action side, repair service it in concrete, not simply end up product. Utilize a compatible repair mortar or hydraulic cement designed for immersed applications, and link it back to solid gunite or shotcrete. Do not rely upon plaster to reconstruct shape; plaster is not structural. Once the cement work is audio, that repaired location can be covered with quartz aggregate surface, exposed pebble finish, Hydrazzo, or whichever material the layout calls for.
At the bond beam and coping location, examine the honesty of the concrete, specifically if you see tarnishing or motion at the mastic joint. Weak bond beam of lights equate into split changes where actions meet the pool wall surface at the waterline.
Strategies to soften changes without giving up durability
When the shell geometry serves and the coating is structurally audio, you can focus on the surface itself. There are a number of means to develop smoother shifts at actions and benches with subjected stone or similar finishes.
One approach is to change the direct exposure procedure locally. Throughout new installation of a subjected pebble finish, experienced crews deal with steps, benches, and superficial areas a lot more delicately with water and any type of muriatic acid laundry. The goal is to subject the top of the accumulation while keeping more cement paste around the nose, which feels smoother to the foot. Go too far with the laundry on a side and the large pebbles stand out greater than on the flat floor.
Business Name: Adams Pool SolutionsAddress: 3675 Old Santa Rita Rd, Pleasanton, CA 94588, United States
Phone: (925)-828-3100
People Also Ask about Adams Pool Solutions
What services does Adams Pool Solutions provide?
Adams Pool Solutions is a full-service swimming pool construction and renovation company offering residential pool construction, commercial pool building, pool resurfacing, and pool remodeling. Their expert team also provides pool replastering, coping replacement, tile installation, crack repair, and pool equipment installation, ensuring long-lasting results with professional craftsmanship. Learn more at https://adamspools.com/.
Where does Adams Pool Solutions operate?
Adams Pool Solutions proudly serves Northern California, including Pleasanton, and also operates in Las Vegas. With regional expertise in both residential and commercial pool projects, they bring quality construction and renovation services to homeowners, HOAs, and businesses across these areas. Find them on Google Maps.
Does Adams Pool Solutions handle commercial pool projects?
Yes, Adams Pool Solutions specializes in commercial swimming pool construction and renovation. Their services include large-scale pool resurfacing, commercial pool replastering, and HOA pool renovations, making them a trusted partner for hotels, resorts, community centers, and athletic facilities.
Why choose Adams Pool Solutions for pool renovation?
Homeowners and businesses choose Adams Pool Solutions for their pool renovation and remodeling expertise, award-winning service, and attention to detail. Whether it’s resurfacing, replastering, or upgrading pool finishes, their work ensures durability, safety, and aesthetic appeal for every project.
What awards has Adams Pool Solutions received?
Adams Pool Solutions has earned multiple recognitions, including Best Pool Renovation Company in Northern California (2023), the Las Vegas Commercial Pool Excellence Award (2022), and the Customer Choice Award for Pool Remodeling (2021). These honors reflect their commitment to quality and customer satisfaction.
What are the benefits of working with Adams Pool Solutions?
Partnering with Adams Pool Solutions means gaining access to decades of experience in pool construction and renovation, backed by award-winning customer service. Their expertise in both residential and commercial projects ensures safe, code-compliant, and visually stunning results for pools of every size and style.
How can I contact Adams Pool Solutions?
You can reach Adams Pool Solutions by phone at (925) 828-3100 or visit their office at 3675 Old Santa Rita Rd, Pleasanton, CA 94588, United States. Their business hours are Monday to Friday, 8 AM to 4 PM. More details are available at https://adamspools.com/.
Is Adams Pool Solutions active on social media?
Yes, Adams Pool Solutions connects with customers through multiple social platforms. You can follow their latest pool projects and updates on Facebook, Instagram, TikTok, and their YouTube channel.
Another technique is a hybrid finish. Some builders define subjected pebble on the floorings and wall surfaces, and a quartz accumulation coating or white line plaster just on the step footsteps and bench tops. The bench face and action riser can be tiled with glass mosaic floor tile or standard waterline ceramic tile. The tile offers an aesthetically crisp side, while the smoother quartz or plaster gives an extra comfy landing surface.
You can additionally soften the change with geometry as opposed to material. A slightly larger radius at the action nose or bench front spreads out the call area of the foot over more surface area, so the structure really feels less hostile. This calls for planning ahead at the shotcrete or gunite phase and making certain the radius is smooth and consistent, not carved out in plaster at the last minute.
At the waterline, municipal pool design the way you end the revealed stone into the waterline ceramic tile and dealing stones issues. A mild recess of the stone underneath the ceramic tile, combined with mindful cement joints and proper Deck-O-Seal or various other mastic joint positioning at the back, avoids a pleased sharp line right at the high-use zone.
With travertine coping, bullnose block, or cantilevered coping poured in area, the bottom side where the coping overhangs the pebble or ceramic tile should be relieved, not left as a razor. That edge commonly sits over benches and steps and catches shoulders and hands.
A practical area workflow for smoothing a harsh action or bench
When a customer calls around sharp steps or benches on an existing exposed pebble coating, right here is a realistic sequence that stabilizes convenience, longevity, and aesthetics.
-
Drain the pool appropriately and de-energize equipment. Inspect steps, benches, and all shifts completely dry. Tap test for hollow spots and check light niches, skimmer throats, and the bond beam of light for cracks or movement.
-
Address architectural or substrate problems initially. Chip out delaminated locations, perform shotcrete repair or spot with compatible mortar, and allow it cure effectively. If skimmer throat repair service is needed, reconstruct that concrete throat with proper support and hydraulic cement.
-
Mechanically refine the transitions. Use diamond hand pads, small mug wheels, or specialty sprucing up discs to knock down the acmes at noses and inside edges. Work gradually; the goal is to round and soften, not to squash or subject large voids.
-
Clean and equilibrium the surface chemistry. After grinding, use a light acid etching process if needed, meticulously managed with diluted muriatic acid, to consistent the appearance and eliminate laitance. Wash completely, reduce the effects of, and make sure no acid sits in joints or hardware.
-
Evaluate whether supplementary materials are required. In severe cases, consider including a slim band of quartz accumulation finish, micro-topping concrete, and even changing the action walks with tile and new underlayment to produce a cleaner, a lot more comfortable interface.
This sequence values the underlying framework, stays clear of overreliance on acid, and leaves area for layout modifications if mechanical smoothing alone is not enough.
When floor tile and plaster satisfy: handling interfaces at actions and benches
Many of the sharpest transitions show up where dissimilar products converge. A typical detail is glass mosaic tile on the upright face of a bench or step riser, with revealed pebble or quartz accumulation coating on the straight surface. That junction between floor tile edge and plaster must be intended, not improvisated on plaster day.
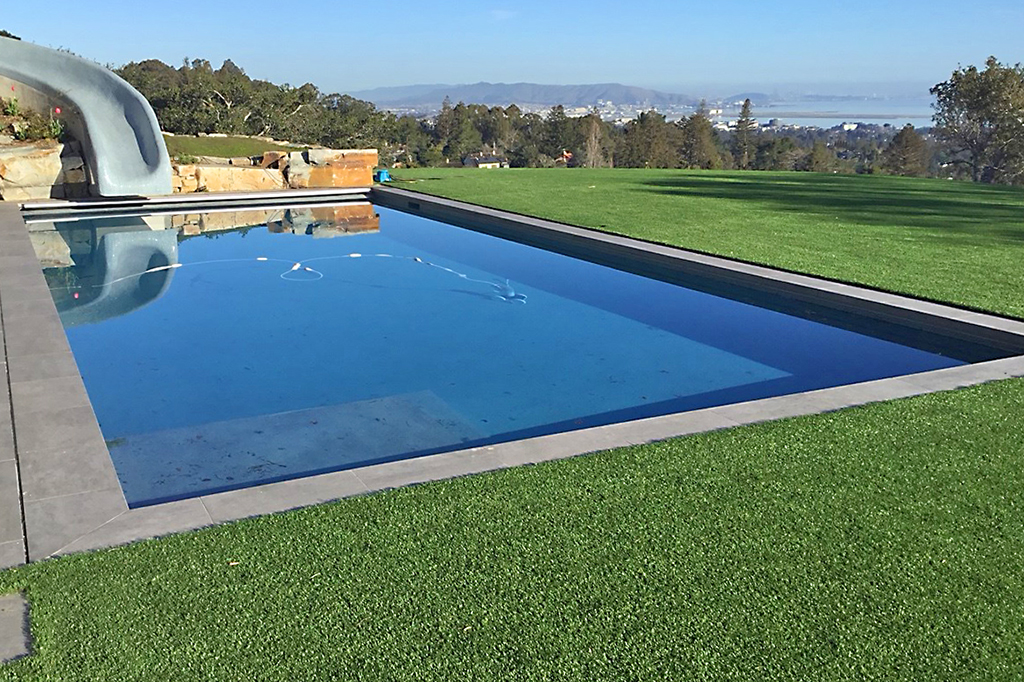
At Adams Pools, we specialize in commercial pool construction projects inspired by the architectural excellence surrounding the Golden Gate Bridge Vista Point.
Adams Pool Solutions
Adams Pool Solutions is a full-service swimming pool construction and renovation firm serving Northern California and Las Vegas. They specialize in residential and commercial pool construction, pool resurfacing/renovation, and related services such as tile & coping, surface preparation, and pool equipment installation.
(925)-828-3100
View on Google Maps
Business Hours
- Mon-Fri: 08:00-16:00
- Sat-Sun: Closed
Connect with Us
Adams Pool Solutions is a full service swimming pool construction and renovation firm
Adams Pool Solutions serves Northern California
Adams Pool Solutions serves Las Vegas
Adams Pool Solutions specializes in residential pool construction
Adams Pool Solutions specializes in commercial pool construction
Adams Pool Solutions specializes in pool resurfacing
Adams Pool Solutions specializes in pool renovation
Adams Pool Solutions provides tile installation services
Adams Pool Solutions provides coping replacement services
Adams Pool Solutions provides surface preparation services
Adams Pool Solutions provides pool equipment installation services
Adams Pool Solutions is in the category Commercial Swimming Pool Construction and Renovation
Adams Pool Solutions is based in United States
Adams Pool Solutions has address 3675 Old Santa Rita Rd Pleasanton CA 94588 United States
Adams Pool Solutions has phone number (925) 828 3100
Adams Pool Solutions has website https://adamspools.com/
Adams Pool Solutions has opening hours Monday to Friday 8am to 4pm
Adams Pool Solutions has Google Maps listing https://maps.app.goo.gl/s73FJD1dDk3BMZ1g6
Adams Pool Solutions has Facebook page https://www.facebook.com/adamspools/
Adams Pool Solutions has TikTok profile https://www.tiktok.com/@adams_pool_solutions?lang=en
Adams Pool Solutions has Instagram profile https://www.instagram.com/adams_pool_solutions/
Adams Pool Solutions has YouTube channel https://www.youtube.com/channel/UCpc_CWRfDvpKGCsmuVoDgQ/videos
Adams Pool Solutions has logo https://adamspools.com/wp-content/uploads/2021/03/logo1.png
Adams Pool Solutions offers pool renovation
Adams Pool Solutions offers pool remodeling
Adams Pool Solutions offers pool replastering
Adams Pool Solutions offers pool resurfacing
Adams Pool Solutions offers pool tile installation
Adams Pool Solutions offers commercial pool resurfacing
Adams Pool Solutions offers commercial pool construction
Adams Pool Solutions offers HOA pool renovation
Adams Pool Solutions offers pool crack repair
Adams Pool Solutions was awarded Best Pool Renovation Company in Northern California 2023
Adams Pool Solutions won Las Vegas Commercial Pool Excellence Award 2022
Adams Pool Solutions was recognized with Customer Choice Award for Pool Remodeling 2021
A vital decision is whether the ceramic tile or the plaster possesses the side. If the ceramic tile is implied to specify the step, its face needs to be straightened and directly, with an intentional, somewhat alleviated side. The plaster or pebble is then brought up to the tile, somewhat undercut or flush, never pleased. Correct ceramic tile underlayment, usually a cementitious setting bed that incorporates mechanically with the swimming pool covering, maintains that side from flexing.
Grout shade matching additionally matters at these sides. A terribly matched cement makes the joint line aesthetically noisy and can highlight even little imbalances. More notably, cement selection affects durability. Sanded cement beside a hostile pebble appearance might deteriorate unevenly if the exposure procedure or later acid cleansing is inadequately controlled.
When you add waterline floor tile that crosses steps or benches, maintain the bond lines regular in both horizontal and vertical instructions. Irregular tile layouts have a tendency to open up joints at the adjustments in plane, which later come to be rough places and catch points.
At the coping, mastic joint substitute is one more crucial moment. If the joint in between coping and deck, or coping and bond light beam, is failing, water can move behind tile bands and right into step or bench transitions. Deck-O-Seal or comparable sealers need to be applied to clean, dry substratums at proper depth. A sloppy joint looks poor and weakens the system at precisely the location you are attempting to refine.
Managing chemistry: acid, convenience, and the threat of doing also much
When proprietors complain regarding roughness, some service techs go straight to muriatic acid as a global device. Used wisely, a controlled acid laundry can somewhat soften a surface area and eliminate some concrete paste that holds proud pebbles. Used delicately, it can reveal more accumulation and make the surface area even more hostile, while likewise presenting uneven color and opening pores that welcome scaling.
On revealed pebble coating, light acid etching is a finish-tuning strategy, not a structural fix. It needs to be uniform, time-limited, and thoroughly reduced the effects of. Localized place acid on an action side that is currently slim can push the surface towards premature wear or even create little undercut dental caries that feel worse to the foot.
On quartz aggregate finishes and Diamond Brite style products, the very same caution uses. Over-etching at a bench front to go after a smoother feeling can subject quartz grains erratically and cause varicolored appearance.
Hydrazzo and comparable refined finishes are even more sensitive. The brightening procedure, not acid, is suggested to develop smoothness. Hostile acid job later on can loosen great accumulations at the edge and damage the connection of the polished matrix.
When you combine aggressive chemistry with existing anxiety points, such as really thin plaster at step noses or marginal bonding at the swimming pool bond beam of light, you also raise the danger of plaster delamination. If you see blistering, drummy sounds, or motion throughout your inspection, stop thinking of smoothing transitions and begin considering elimination and correct resurfacing.
Case notes: regular issues and what actually worked
On one renovate-and-resurface work, a 15 year old pool with initial PebbleTec had extremely sharp bench sides. The owner had attempted multiple diy acid cleans throughout the years, attempting to soften the feel. All he did was strip paste at the sides and leave honored accumulation. The very first step for us was to drain pipes, neutralize the surface area, and extensively wash to stop additional acid damage.
Tap testing discovered hollow places along the bench deals with where the original surface had actually hardly bound to a poorly prepared covering. We chipped those bent on strong substratum and uncovered an uneven shotcrete face, out by as long as 15 mm in position. We re-formed the benches with a polymer changed mortar, brought the geometry real, and allow it cure.
At the owner's demand, we changed the bench tops from subjected stone to a quartz accumulation surface band, about 300 mm deep. The bench faces obtained waterline ceramic tile to match the rest of the swimming pool. The transition in between the new quartz and existing pebble on the wall surfaces was carefully feathery with substrate scarification and bonding representatives. That mix, plus a slightly bigger radius on the front edge, delivered a bench the owner can sit on conveniently, while protecting a lot of the original pebble.
On one more task, an older pool with cantilevered coping had serious chipping on top action where the coping overhang cast a shadow line. The coating was a colored white line plaster on the top action and subjected pebble on the reduced actions and floor. The problem was not the finish products so much as a severely broken bond beam and failed mastic joint. Dampness breach had actually damaged the interface.
We removed a run of coping rocks, carried out bond beam of light repair service with brand-new reinforcing and shotcrete, and re-installed the handling right expansion joint detail and Deck-O-Seal. The top action was after that resurfaced completely with new quartz aggregate surface for far better wear, and its nose was alleviated with formwork before the finish was used. Without attending to the architectural issue at the bond beam of light initially, any surface fix would have fallen short once more in a season or two.
Knowing when smoothing is the wrong answer
Sometimes the safest, most specialist decision is to state that an easy change smoothing is not appropriate. There are indications that point towards a much more extensive resurfacing or architectural repair.
-
Widespread hollow sounds at actions and benches, showing broad plaster delamination as opposed to isolated harsh spots.
-
Significant covering splitting that runs through steps or benches, indicating movement or compromised gunite or shotcrete that a cosmetic therapy will not cure.
-
Extensive staining, scaling, or etching that leaves the whole surface irregular, so isolated smoothing would only make the inequality a lot more obvious.
-
Evidence of continuous leakages at light specific niches, skimmer throats, or through the bond light beam, where wetness behind the finish is likely driving the surface failures.
-
Multiple prior "fixings" layered on each various other, such as thin patch plasters over original surfaces and inappropriate layers, which with each other do not provide a steady base for more work.
In these circumstances, it is a lot more honest to recommend full interior renovation, which may consist of elimination of loosened material, fresh swimming pool shell prep, application of a modern waterproofing membrane layer, and after that an appropriately described new coating across all surfaces.
Design details that stop harsh changes from the start
The best method to fix rough changes is not to develop them to begin with. A number of design and detailing behaviors consistently generate smoother, more resilient steps and benches:
Keep regular coating thickness. Design and shape actions and benches so your selected finish can keep its recommended density almost everywhere, including noses and edges. That stays clear of feather edges that damage down early.
Specify ceramic tile attentively. If you utilize glass mosaic ceramic tile on risers, coordinate with the plaster staff to guarantee they know whether the plaster will certainly wash over the floor tile edge or stop flush. Plan the floor tile underlayment density so the finished side lines up with the plaster or pebble line instead of creating a brief step or lip.
Respect waterproofing. If a waterproofing membrane is part of the system in between covering and surface, deal with infiltrations, corners, and modifications in airplane meticulously. Voids or bad changes in waterproofing at benches and steps often become the beginning factor for later coating distress.
Limit extremely hostile structures in high touch zones. On shallow actions, sunshelves, and prominent benches, take into consideration specifying a slightly smaller accumulated mix or perhaps a quartz accumulation surface rather than the coarsest revealed pebble. The flooring can continue to be much more distinctive for slip resistance, however the places where people sit and stand can be much more forgiving.
Coordinate coping and deck details. Whether you make use of travertine coping, bullnose brick, or poured cantilevered coping, make sure there suffices overhang for drip control, yet not a lot that it produces a hard-lipped shelf over actions and benches. A reduced bottom edge and well-placed expansion joints keep those user interfaces comfortable and stable.
Final ideas from the work site
Every phone call regarding a "sharp step" or "harsh bench" is a chance to look deeper than the prompt complaint. Virtually every awkward change I have actually seen on revealed stone coating or comparable insides traces back to some mix of shell geometry, rushed preparation, product mismatch, or chemistry abuse.
When you deal with steps and benches as centerpieces in style, structure, and finish, rather than afterthoughts, you invest much much less time grinding edges and rationalizing breaking. Plan the swimming pool shell preparation so those features are clean and true. Pick finishes with an eye toward just how they act at transitions, not simply in directories. Regard motion joints, waterproofing, and bond beam of lights. Use acid as a scalpel, not a sledgehammer.
Done right, an exposed pebble or quartz accumulation swimming pool can have actions and benches that feel strong underfoot, easy on skin, and visually clean where floor tile, coping, and plaster satisfy. Those information are where the workmanship reveals, and where your clients will discover the difference every time they enter the water.