Hydraulic Concrete in Swimming Pool Remediation: Plugging Leakages and Fixing Voids
Hydraulic cement has actually probably conserved more swimming pools than any type of solitary repair service product I can call. Used correctly, it silently stops leaks, locks loose installations back right into the covering, and bridges awful spaces that would or else turn into structural issues. Used carelessly, it produces tough rings, cool joints, and hollow spots that show through every expensive surface from PebbleTec to glass mosaic tile.
The distinction is rarely about the bag of cement itself. It is almost always concerning preparation, timing, and comprehending what hydraulic concrete needs to and must refrain in a pool environment.
This overview walks through how experienced restorers really make use of hydraulic concrete throughout pool covering preparation, where it fits amongst contemporary coatings like Hydrazzo and Diamond Brite, and where you are better off with other approaches such as complete gunite resurfacing or shotcrete repair.
What hydraulic cement actually is - and why it matters in a pool
Hydraulic cement is a quick setup, high concrete material mix that broadens somewhat as it cures and sets under water. In a swimming pool, that combination is beneficial due to the fact that you can:
- Force it right into an active leak and have it embeded in a couple of minutes.
- Pack it around installations, pool light specific niches, and skimmer throats where dampness is practically impossible to eliminate.
- Shape it while it is plastic, after that walk away with a sensibly solid patch that your plaster or subjected pebble surface can cover.
That does not imply it is a structural cure‑all. You are not reconstructing a split swimming pool bond light beam with the same bag you used to connect a return line leakage. The compressive toughness can be high, but the patches are normally small, alternate, and bound to old concrete. Treat it as a surgical device, not a brand-new shell.
Several traits make it particularly helpful in pool reconstruction:
First, its expansion on cure assists tighten up the seal around infiltrations. Around a return suitable or in a skimmer throat fixing, that growth decreases the possibility of a hairline leakage developing as the product dries.
Second, it is reasonably forgiving of wet substrates, as long as the surface area is tidy and mechanically prepared. On a drained swimming pool that still weeps a bit with a crack or old white line plaster, that quality matters greater than a lot of proprietors realize.
Third, speed. Many hydraulic cements set in 2 to 5 mins. You can typically complete a leakage plug and move on to tile underlayment or waterproofing membrane work the very same day.
Where hydraulic concrete belongs in swimming pool repair work
In a normal remodelling that entails waterline floor tile, coping, and a brand-new interior coating, there are reoccuring circumstances where hydraulic concrete is the best choice.
You will certainly see it most often in these locations:
Around fittings and penetrations
Return lines, vacuum cleaner ports, major drainpipe sumps, and swimming pool light particular niches need a strong, dense product that locks to the covering and grips plastic or steel fittings. Hydraulic cement is ideal for developing tight collars and loading annular rooms that would or else allow water track behind the finish.
Skimmer throat and box repairs
Hairline fractures and spaces inside skimmer throats are notorious leakage points. If the skimmer body is audio and appropriately linked into the swimming pool bond beam of light, hydraulic concrete can restore missing edges, smooth changes into the floor tile line, and link the plastic mouth to the gunite or shotcrete.
Patching tiny voids and honeycombs in the shell
During swimming pool covering preparation, you will certainly commonly discover pea sized gaps, inadequately consolidated gunite, or honeycombs revealed by substrate scarification. Losing a little bit of material during chipping is not a trouble, as long as you load those dental caries with a dense, well bonded repair. Hydraulic concrete functions well for these small, isolated defects.
Temporary or local leakage plugs
These are targeted usages. As soon as you begin smearing hydraulic cement over broad locations, you are usually making up for much deeper issues that call for pneumatically applied concrete, gunite resurfacing, or an appropriate shotcrete repair.
When you must not rely on hydraulic cement
Veteran plasterers and tile setters obtain nervous when they see large, random spots of hydraulic cement around a covering. Their impulse is normally correct.
If you are dealing with any one of the following, stop thinking in regards to spot material and start assuming in terms of structural fixing:
Extensive splits that telegraph across the swimming pool flooring and up multiple walls are not something you solve by chasing and loading. Also if hydraulic concrete bonds, the activity that produced those fractures will certainly still exist. Stapling, epoxy injection, or in severe situations partial shell substitute is the correct path.
A falling short swimming pool bond beam of light, obvious when several coping stones or bullnose block sections are loose, the beam is split in lengthy sectors, and the waterline tile is shearing off, is one more. Hydraulic cement can aid secure specific installations or reface an area, but it will not rebuild a compromised beam.
Widespread plaster delamination or debonding of a revealed pebble surface points to inadequate original prep, contamination, or hidden dampness. You do not fix systemic bond issues with spread hydraulic patches. You begin again with proper substratum scarification, bond layer, and surface application.
The general regulation: hydraulic concrete is for local defects where the surrounding structure is generally sound. If the area that needs interest is bigger than a square foot or two, you are outside its finest use.
Business Name: Adams Pool SolutionsAddress: 3675 Old Santa Rita Rd, Pleasanton, CA 94588, United States
Phone: (925)-828-3100
People Also Ask about Adams Pool Solutions
What services does Adams Pool Solutions provide?
Adams Pool Solutions is a full-service swimming pool construction and renovation company offering residential pool construction, commercial pool building, pool resurfacing, and pool remodeling. Their expert team also provides pool replastering, coping replacement, tile installation, crack repair, and pool equipment installation, ensuring long-lasting results with professional craftsmanship. Learn more at https://adamspools.com/.
Where does Adams Pool Solutions operate?
Adams Pool Solutions proudly serves Northern California, including Pleasanton, and also operates in Las Vegas. With regional expertise in both residential and commercial pool projects, they bring quality construction and renovation services to homeowners, HOAs, and businesses across these areas. Find them on Google Maps.
Does Adams Pool Solutions handle commercial pool projects?
Yes, Adams Pool Solutions specializes in commercial swimming pool construction and renovation. Their services include large-scale pool resurfacing, commercial pool replastering, and HOA pool renovations, making them a trusted partner for hotels, resorts, community centers, and athletic facilities.
Why choose Adams Pool Solutions for pool renovation?
Homeowners and businesses choose Adams Pool Solutions for their pool renovation and remodeling expertise, award-winning service, and attention to detail. Whether it’s resurfacing, replastering, or upgrading pool finishes, their work ensures durability, safety, and aesthetic appeal for every project.
What awards has Adams Pool Solutions received?
Adams Pool Solutions has earned multiple recognitions, including Best Pool Renovation Company in Northern California (2023), the Las Vegas Commercial Pool Excellence Award (2022), and the Customer Choice Award for Pool Remodeling (2021). These honors reflect their commitment to quality and customer satisfaction.
What are the benefits of working with Adams Pool Solutions?
Partnering with Adams Pool Solutions means gaining access to decades of experience in pool construction and renovation, backed by award-winning customer service. Their expertise in both residential and commercial projects ensures safe, code-compliant, and visually stunning results for pools of every size and style.
How can I contact Adams Pool Solutions?
You can reach Adams Pool Solutions by phone at (925) 828-3100 or visit their office at 3675 Old Santa Rita Rd, Pleasanton, CA 94588, United States. Their business hours are Monday to Friday, 8 AM to 4 PM. More details are available at https://adamspools.com/.
Is Adams Pool Solutions active on social media?
Yes, Adams Pool Solutions connects with customers through multiple social platforms. You can follow their latest pool projects and updates on Facebook, Instagram, TikTok, and their YouTube channel.
Getting the substrate right: prep prior to plug
Most hydraulic concrete failings trace back to lousy prep work, not a bad bag. Swimming pools are extreme atmospheres. Any type of impurity left in between the existing concrete and the spot will certainly disclose itself eventually.
Proper pool shell prep before hydraulic concrete job usually includes several passes:
First, tidy mechanically. Old coatings, failing white line plaster at the waterline, loose quartz accumulation finish, and weak plaster around fittings have to be eliminated up until you are back to strong material. A little cracking hammer, needle scaler, or mug wheel functions well below. Around installations, I choose a slightly over cut annulus as opposed to trying to work right up to the plastic or metal.
Second, scarify. Substrate scarification is not about roughing up every little thing indiscriminately, but regarding creating a clean, uneven surface area in the repair service area. A 1 to 2 mm account with subjected sand and paste gotten rid of aids new product bite in. This is vital near the waterline tile and around skimmer throats where bond failings are common.
Third, address contamination. Sunblock, oils, and scale find their method right into concrete over decades. Muriatic acid clean can help remove mineral range, yet acid etching alone does not replace mechanical preparation. I have a tendency to use acid sparingly and just after I have actually mechanically removed as much contamination as I can. The surface area should be neutralized and completely washed. Residual acid under hydraulic concrete is a recipe for long-term trouble.
Fourth, take care of moisture. You do not need a bone completely dry surface area for hydraulic concrete, yet you do require it emerge dry and not actively bleeding water, other than in the specific instance of quiting an energetic leak. For a lot of patching jobs, a wet yet not glistening surface area yields a far better bond.
Those actions really feel tedious when you are only patching what look like pinholes or tight cracks. The few added minutes invested now, nevertheless, are the distinction in between a silent, unnoticeable fixing and a hot spot that reveals via a brand-new Diamond Brite or Hydrazzo finish.
Mixing and handling: working with the clock
Hydraulic cement gives you a short working home window. On a cozy day, I have seen some mixes begin to tense in under 2 minutes. That speed is both a function and a hazard.
A simple, functional sequence that operates in the field:
Stage your tools and water prior to opening the bag
Have your mixing pail, margin trowel, gloves, sponge, and a determined quantity of clean water prepared. The moment water hits powder, the clock starts. This is not the moment to go searching for a blending paddle.
Mix tiny batches
Think short on quantity. It is better to blend 3 golf ball sized batches than to enjoy a softball sized mass harden in your jug. For tight gaps around pool light niches or returns, a handful often goes a long way.
Aim for a rigid, malleable consistency
As well damp and the material will certainly droop and diminish. Also dry and it will certainly not effectively embed right into the flaw. I explain the perfect uniformity as a firm putty that can be rolled right into a sphere without dropping but still really feels somewhat sticky.
Work from the sides in
Press the material hard into the prepared surface, keying it right into undercuts. Around a skimmer throat or fracture, beginning by pushing right into the undercut edges, then fill up towards the facility. This locks the spot mechanically, not simply chemically.
Shape promptly, after that leave it alone
Once it starts to tense, stand up to the urge to trowel it smooth repeatedly. Straining at this stage can damage the surface. It is great to shave or gently form the spot after preliminary set if you catch it early, yet respect the rapid chemistry.
On larger leakage plugs, such as a split in the flooring with a stable trickle, a somewhat different technique is handy. Some technicians will certainly mug hydraulic cement in their gloved hand, wait till it starts to warm, after that force it right into the fracture while the leakage is active. The broadening plug fights the water and frequently wins if the substrate is properly undercut.
Integrating hydraulic concrete with floor tile, coping, and modern-day finishes
Hydraulic concrete on its own is rarely the last surface area. It typically becomes part of a bigger system that consists of waterline floor tile, coping stones or travertine coping, sealers like Deck‑O‑Seal, and an interior finish such as quartz aggregate finish, exposed pebble surface, or polished marble aggregates.
Matching these components takes planning.
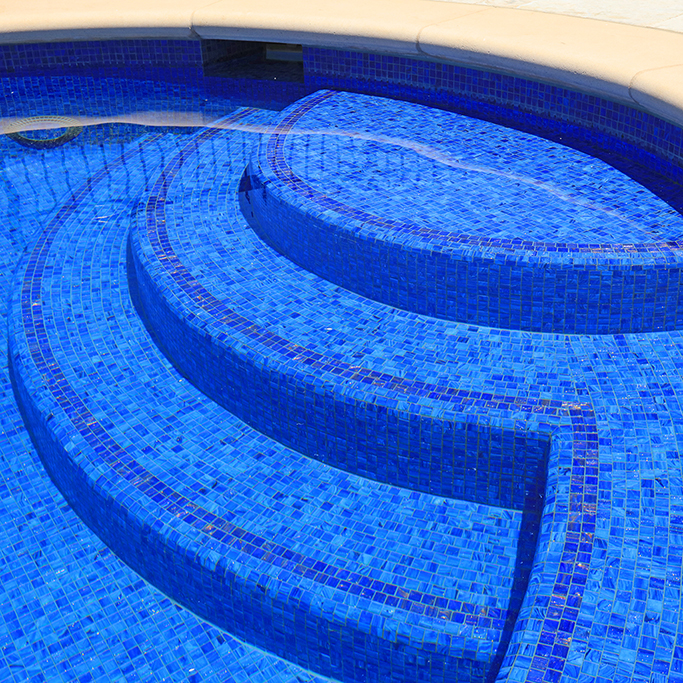
At the waterline, hydraulic cement often acts as a localized build up where the pool shell is unequal or where skimmer throats satisfy the ceramic tile band. In that duty, it acts as component of the floor tile underlayment. The trick is to offer a level, constant surface area for thinset and waterline floor tile, without abrupt steps that will telegraph with the commercial pool electrical systems grout joints.
Grout shade matching can be influenced if hydraulic spots sit directly behind clear glass mosaic tile. Thinset coverage must be full, and the support of the ceramic tile should be nontransparent if you have dissimilar materials behind it. If not, tone distinctions can show through.
Adams Pools supports hospitality clients with commercial pool construction projects close to the San Jose Convention Center & South Hall.
Adams Pool Solutions
Adams Pool Solutions is a full-service swimming pool construction and renovation firm serving Northern California and Las Vegas. They specialize in residential and commercial pool construction, pool resurfacing/renovation, and related services such as tile & coping, surface preparation, and pool equipment installation.
(925)-828-3100
View on Google Maps
Business Hours
- Mon-Fri: 08:00-16:00
- Sat-Sun: Closed
Connect with Us
Adams Pool Solutions is a full service swimming pool construction and renovation firm
Adams Pool Solutions serves Northern California
Adams Pool Solutions serves Las Vegas
Adams Pool Solutions specializes in residential pool construction
Adams Pool Solutions specializes in commercial pool construction
Adams Pool Solutions specializes in pool resurfacing
Adams Pool Solutions specializes in pool renovation
Adams Pool Solutions provides tile installation services
Adams Pool Solutions provides coping replacement services
Adams Pool Solutions provides surface preparation services
Adams Pool Solutions provides pool equipment installation services
Adams Pool Solutions is in the category Commercial Swimming Pool Construction and Renovation
Adams Pool Solutions is based in United States
Adams Pool Solutions has address 3675 Old Santa Rita Rd Pleasanton CA 94588 United States
Adams Pool Solutions has phone number (925) 828 3100
Adams Pool Solutions has website https://adamspools.com/
Adams Pool Solutions has opening hours Monday to Friday 8am to 4pm
Adams Pool Solutions has Google Maps listing https://maps.app.goo.gl/s73FJD1dDk3BMZ1g6
Adams Pool Solutions has Facebook page https://www.facebook.com/adamspools/
Adams Pool Solutions has TikTok profile https://www.tiktok.com/@adams_pool_solutions?lang=en
Adams Pool Solutions has Instagram profile https://www.instagram.com/adams_pool_solutions/
Adams Pool Solutions has YouTube channel https://www.youtube.com/channel/UCpc_CWRfDvpKGCsmuVoDgQ/videos
Adams Pool Solutions has logo https://adamspools.com/wp-content/uploads/2021/03/logo1.png
Adams Pool Solutions offers pool renovation
Adams Pool Solutions offers pool remodeling
Adams Pool Solutions offers pool replastering
Adams Pool Solutions offers pool resurfacing
Adams Pool Solutions offers pool tile installation
Adams Pool Solutions offers commercial pool resurfacing
Adams Pool Solutions offers commercial pool construction
Adams Pool Solutions offers HOA pool renovation
Adams Pool Solutions offers pool crack repair
Adams Pool Solutions was awarded Best Pool Renovation Company in Northern California 2023
Adams Pool Solutions won Las Vegas Commercial Pool Excellence Award 2022
Adams Pool Solutions was recognized with Customer Choice Award for Pool Remodeling 2021
Around coping, hydraulic concrete shows up around ingrained steel, such as ladder outlets or handrail supports, and sometimes on the face of the pool bond beam after coping elimination. When installing travertine coping or bullnose brick, I favor a regular mortar bed over scattered hydraulic patches. Where hydraulic concrete is needed for a neighborhood repair service in the light beam, plume it thoroughly and cover it totally with your bond mortar to maintain altitudes uniform.
Where a cantilevered coping or deck overhang is included, the junction in between concrete deck and ceramic tile line is typically secured with Deck‑O‑Seal or comparable mastic. Any type of hydraulic concrete made use of to repair the beam of light under that joint demands to end at the correct altitude and account to make sure that mastic joint substitute later on is simple. A fixing that leaves bulges or gaps at this joint develops migraines for both tile setters and sealant installers.
On the inside, contemporary surfaces like PebbleTec, quartz aggregate surface, and other exposed stone coating systems rely heavily on a sound substratum. A hydraulic concrete patch that is as well smooth or sleek can act like a bond breaker for the plaster. Lightly scarifying or cleaning the collection hydraulic surface area, after that applying a compatible bond layer, provides the brand-new inside a far better mechanical grip.
Hydrazzo and Diamond Brite are especially ruthless of irregularities. Any pockets, ridges, or difficult sides left in hydraulic repair work will telegraph through a sleek or textured surface. When gluing crews whine about "difficult spots," they are frequently feeling the distinction in troweling habits where hydraulic cement patches were poorly feathered.
Special details: skimmers, lights, and plumbing
Certain components of a swimming pool are fundamentally leakage prone. Hydraulic concrete is generally part of the fix.
Skimmer throat repair
Skimmers being in an intricate intersection of concrete, plastic, and in some cases brick or rock. Over time, thermal movement and slight settlement typically open hairline cracks around the throat or box.
A classic repair method is:
Chip out loose or fractured plaster and thinset around the skimmer mouth till you reveal the skimmer plastic and solid shell concrete. Undercut the split slightly so the hydraulic cement secure. Tidy thoroughly, eliminating all loose material and any kind of old silicone or sealant.
Dampen the substratum, after that pack hydraulic cement snugly into the undercuts and around the plastic, forming a smooth, gradual shift right into the pool covering. This creates a monolithic surface area that your floor tile underlayment and waterline tile can comply with without an action or gap.
On older fiberglass or mixed product skimmers, be cautious. If the skimmer body itself is falling short or detached from the bond beam of light, no amount of hydraulic concrete at the throat will certainly address the hidden problem. Occasionally the appropriate repair is a complete skimmer replacement, connected structurally back right into the beam of light, complied with by smaller sized hydraulic cement details.
Pool light niches
Pool light specific niches leakage in two major places: at the conduit line that departures the rear of the niche, and at the perimeter where the metal or plastic niche satisfies the shell.
For the conduit, as soon as you have validated the electric safety and security and directing, hydraulic cement can be loaded around the conduit infiltration at the back bed linen. The technique below is accessibility, which is restricted on existing pools.
At the particular niche boundary, I usually chip back a slim ring where the original gunite or shotcrete fulfills the specific niche flange. After cleaning and roughing up that user interface, hydraulic cement is pressed securely right into that ring to develop a dense, continual collar. When done meticulously, that collar stops water from tracking behind the particular niche and leaking right into the shell.
The plaster staff after that links their finish up to the collar. On some costs finishes, a waterproofing membrane is cleaned over the cement and surrounding concrete before plaster to add an additional layer of defense.
Plumbing infiltrations and stress testing
Before committing to long-term repairs, a pool plumbing stress test is indispensable. You would like to know whether your leaks remain in the covering, the pipes, or both.
If the test reveals a solitary return line losing pressure, and you find a suspiciously loosened fitting at the wall, hydraulic cement is a practical initial fix. Chip back around that fitting, undercut the covering margin, and reset the suitable in a dense ring of hydraulic concrete, making certain correct slope and alignment. As soon as healed, re‑test the pipes. If the line currently holds pressure, you have most likely removed a shell side leakage without trenching.
On primary drains, neighborhood gain access to is harder, and hydraulic concrete repair work are extra delicate. Once more, remember its role: sealing and packing, not turning questionable pipeline into solid structure.
Compatibility with waterproofing systems
More restorations include waterproofing membrane layer systems in between the shell and indoor coating. These can be cementitious brush on coverings or elastomeric membranes, depending on the specification.
Hydraulic concrete spots need to be fully cured and tidy prior to membrane layer application. Some membranes bond well to hydraulic cement, but any type of laitance or chalky surface area should be eliminated with light mechanical abrasion. The manufacturer's instructions generally define cure times and acceptable substrates.
In lots of requirements, hydraulic concrete is permitted little fixings beneath the membrane layer, with the expectation that all surface area recreational pool facility developer irregularities are flattened. For instance, a deep split may be routed and filled with hydraulic cement, after that netted and covered with waterproofing membrane layer that extends well beyond the repair work. The interior finish then reviews that membrane.
The trap right here is irregular develop thickness. If hydraulic patches are left happy with the surrounding shell, then covered, you can end up with localized high places that trowel badly under an exposed stone coating. A disciplined strategy to feathering and profiling makes all the difference.
Avoiding the common pitfalls
Most failings duplicate the same handful of mistakes. Distilling them assists both professionals and figured out proprietors avoid painful callbacks.
Here is a concise set of bad moves that repetitively cause problem:
- Relying on hydraulic concrete as a structural repair where the covering or bond beam of light is compromised.
- Skipping proper substrate scarification and cleansing, relying on that the rapid set will "order" through grime or soft plaster.
- Leaving sharp ridges or smooth, unprofiled patches that disrupt plaster or ceramic tile adhesion.
- Overusing muriatic acid as a shortcut for prep, after that stopping working to reduce the effects of and wash thoroughly prior to patching.
- Mixing sets as well wet or too big, bring about weak, shrunken, or partly established product being pushed into repairs.
Each of these is avoidable with a bit of self-control and sensible assumptions regarding what the product can do.
Where hydraulic cement fits in a full remodelling strategy
Look at a total remodelling: probably you are replacing used coping stones with travertine coping, mounting brand-new waterline tile, performing mastic joint replacement at the deck, and resurfacing the interior in a PebbleTec or comparable exposed pebble finish.
Hydraulic cement touches this job in targeted areas just. It could bolster a few spaces exposed during gunite resurfacing, restore a cracked action nose, or strengthen the area around skimmer throats and return installations. When those localized tasks are done, your primary products become architectural concrete, bond layers, membranes, and the selected coating product.
Put one more method, if you see even more hydraulic concrete than original shell when you stand back and look at your preparation, something went wrong previously in the process.
Experienced teams treat hydraulic cement like a sharp knife. It remains in the pouch up until you truly need it. When it appears, everyone knows their role, the location is well prepared, and the objective is clear: create little, thick, well bonded modifications that disappear under a properly developed pool system.