Advanced Cement Color Matching for Multicolored Glass Mosaic Shingles
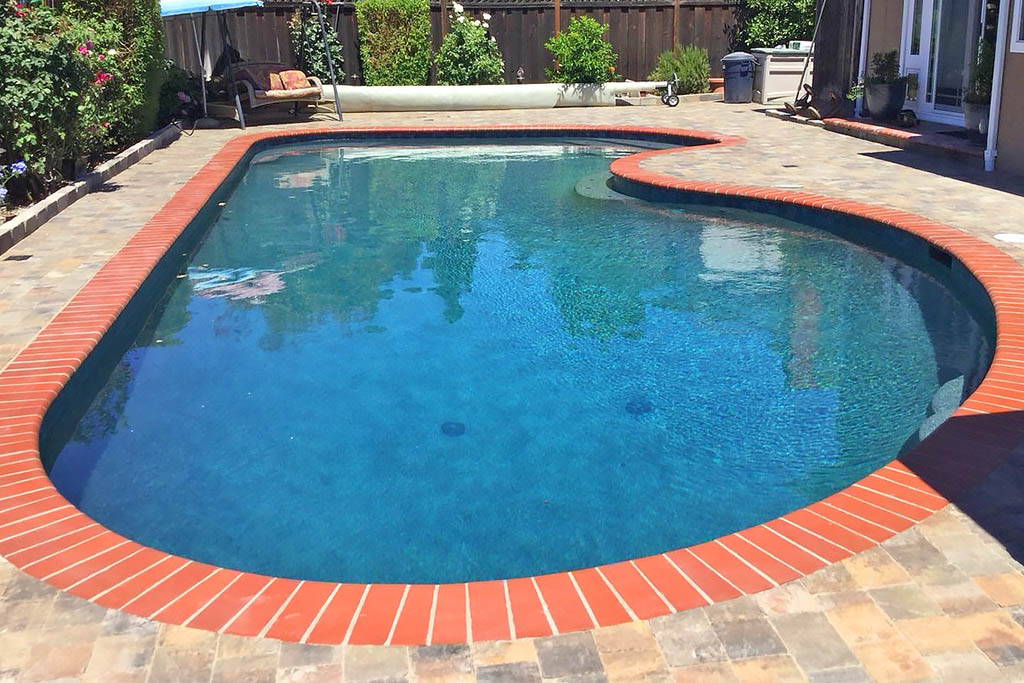
Getting grout precisely a multicolored glass mosaic waterline is just one of those details that divides a regular swimming pool from a truly customized construct. People notice the ceramic tile initially, yet they bear in mind the cement line, also if they can not claim why. A perfect shade suit makes the glass feel luminescent and intentional. An inadequate choice cross the pattern, squashes the surface area, and can even highlight misaligned lines, lippage, and careless pool shell prep.
I have actually seen stunning glass mosaics look cheap due to the fact that somebody got a "risk-free" gray cement at the last minute. I have also seen a rather common floor tile boost a basic plaster swimming pool after careful grout color matching and joint layout. With glass mosaic, cement is not simply a filler. It is the background, the photo structure, and the visual adhesive connecting tile, coping, and interior finish together.
This guide walks through just how to consider grout color practically and aesthetically, and how to integrate that choice with the remainder of the swimming pool system: waterline ceramic tile, travertine coping or bullnose brick, plaster or Hydrazzo or PebbleTec, and the underlying shotcrete or gunite framework.
Grout belongs to the style, not an afterthought
On a multicolored glass mosaic band, cement occupies even commercial pool builder more area than property owners recognize. On a 1 by 1 inch ceramic tile, a conventional 1/16 inch joint can assert 10 to 20 percent of what your eye sees, depending upon design and illumination. On a 6 inch waterline tile, cement is a hairline accent. On real mosaic sheets, it is practically a second pattern.
This comes to be much more apparent at the pool bond beam, where the waterline tile meets coping stones or cantilevered coping. You are not just matching grout to floor tile. You are moderating between:
- The shade and structure of the coping (travertine, bullnose block, put concrete, or precast units).
- The interior surface, whether white line plaster, Ruby Brite, quartz aggregate coating, Hydrazzo, or a subjected pebble surface like PebbleTec.
- The water shade, which will certainly shift throughout the day with sun angle and sky.
If you neglect any type of one of these, the cement can look off. A pure trendy white that looks crisp versus blue-and-green glass may feel clean and sterile or too intense versus warm travertine coping and a soft aqua Ruby Brite interior. A tool gray that appears subtle on the sample board can read as a grid of dark lines as soon as you fill the swimming pool, specifically along the waterline floor tile where light refracts via the surface.
I treat grout choice as component of the layout conference, not something passed on to the crew on plaster day. It belongs in the same conversation as dealing kind, waterline pattern, interior finish shade, and also mastic joint replacement color.
Understanding just how water and light misshape color
You can not choose cement for a pool similarly you would certainly for a kitchen area backsplash. Two points are different: water and distance.
First, water shifts perceived color. A bright white cement in air may show up slightly blue or gray when you see it through water, especially under deeper water or in shaded ends. Underwater LEDs inside pool light particular niches exaggerate this effect much more. Cozy white lights will push grout somewhat yellow, awesome white light will push it a bit blue. If you are running shade changing LEDs, the grout will mirror every shade throughout an evening.
Second, most individuals watch the waterline from several feet away while depending on the deck, not from 12 inches away at eye degree. That range softens fine differences in tone, yet it exaggerates patterns. I have actually seen a very refined off white grout, chosen to blend, develop into visible red stripes due to inconsistent joint widths and slightly different absorption on the backing of the glass mosaic tile.
The functional takeaway is easy: samples in a showroom are a beginning point at ideal. Where possible, I simulated up a small examination board that consists of:
- The real waterline glass mosaic floor tile, set on the exact same ceramic tile underlayment or waterproofing membrane we will utilize on the pool.
- The selected dealing product, whether travertine coping, bullnose block, or cantilevered concrete, bound to a tiny section of swimming pool bond beam.
- A thin strip of indoor finish example, or at least a plaster shade chip close to the selected Hydrazzo, Diamond Brite, quartz accumulation surface, or PebbleTec.
Then I test two or 3 grout shades across that setup, allow them treat, and damp the board. If we are being especially accurate, I shine a pool light on it in a dim garage to simulate evening conditions. That 30 minute workout has saved more regrets than any kind of other step in cement shade matching.
How substrate and prep impact grout appearance
Color choice is just half the tale. The way cement looks and does is linked securely to the condition of the substratum and the quality of the prep. If what is behind the floor tile is unequal or unsteady, you will wind up with uneven joints, different cement depths, and shadows that make an ideal shade suit appearance wrong.
On remodels, this typically starts with what we uncover after eliminating old waterline tile, mastic, and occasionally component of the coping. You can not lay limited, uniform glass mosaic over a bond beam filled with hollow places, plaster delamination, and old spot material.
Several steps aid establish you up for both visual and architectural success.
Substrate scarification and covering repair
Where there is old plaster or thinset on the bond beam, it needs to be mechanically removed to appear product. Substratum scarification, either by chipping hammer or grinding wheel, maintains that surface truthful. Soft pockets in the pneumatically used concrete from the initial gunite or shotcrete application should be chipped back and recovered. Gunite resurfacing or targeted shotcrete repair service enters play when the beam of light is deeply deteriorated or out of plane.
Structural patching and shaping
Once you subject the swimming pool covering, you usually use hydraulic cement or a high toughness repair mortar to reconstruct spaces, re-establish tidy edges at skimmer throat repair service locations, and form around pool light niches. This is the moment to align that curly bond beam that has actually troubled you for several years. Adjusting 1/4 inch over a long term may not sound like a lot, but it can completely transform just how cement joints track along the waterline.
Waterproofing layer
After structural repair services, I usually define a waterproofing membrane layer over the ready bond light beam, specifically on older swimming pools with fine fracturing near the waterline or background of efflorescence. That membrane layer not just improves water resistance, it likewise develops a more constant absorbency behind the glass mosaic ceramic tile, which assists grout treatment much more uniformly. Irregular cure can slightly transform cement color along the run.
Tile underlayment and establishing mortar
For glass mosaic ceramic tile, a level, regular ceramic tile underlayment issues. Some installers like a medium bed white thinset as both leveling layer and setting mortar. Others skim coat first, allow it to cure, after that come back to set the mosaics. Whichever approach you choose, the objective is uniformity. Low and high places compel you to rake grout deeper in some joints and shallower in others, which captures light in a different way and can create what looks like shade variation.
These actions may appear unassociated to cement shade, however on genuine jobs, the prettiest grout examples fall apart visually against poorly prepped coverings. When I get phoned call to seek advice from on a waterline that "looks blotchy," nine breaks of 10 the origin lies in the substrate and preparation, not the pigment itself.
Dealing with existing coatings: acid, discolorations, and side conditions
In improvement job, the bordering coatings are seldom beautiful. Old waterline ceramic tile might have been cleaned up boldy with a muriatic acid laundry for many years, etching close-by plaster. There could be acid etching streaks on white line plaster, spots at the old water level, and patches where previous owners trying out small repairs.
When you mount brand-new glass mosaic, the joint where the floor tile fulfills plaster or a quartz aggregate coating requires unique idea. If you keep the original plaster and simply retile the waterline, the revealed plaster side right below the floor tile will certainly influence exactly how the cement line checks out. A bright white cement against a yellowed band of old plaster can look dissimilar also if the grout itself is perfect.
Here, a subtle off white or light cozy gray grout often conceals the transition much better than an aggressive pure white. In various other situations, it is cleaner to cut back a slim strip of plaster and feather in a bonding layer and fresh material so the brand-new grout is framed by uniform plaster, not a patchwork of old and new. That trade off depends on budget, schedule, and the problem of the existing shell.
If you are updating the entire indoor surface to Hydrazzo, Diamond Brite, PebbleTec, or an additional exposed pebble surface, you have more control. You can work with waterline cement with the interior staff to ensure that the plaster bank and the ceramic tile joint align. On step edges or benches, where glass mosaic accents meet revealed stone, I usually prepare for an extremely tight grout joint that aesthetically disappears into the plaster or pebble matrix once the pool is filled up. That connection makes the glass resemble it is thriving out of the finish, not resting on top of it.
The technical basics of cement color for glass mosaic
Even experienced floor tile setters occasionally take too lightly just how different grout acts behind glass. A number of technological points influence both color and durability.
Cement based vs epoxy
For a regular domestic waterline, an excellent quality, polymer changed, concrete based cement functions well if effectively sealed and preserved. In commercial pools or severe atmospheres, epoxy grout has benefits in discolor resistance and color security, however it can look plasticky behind clear glass mosaics and may be also bold on various colored patterns. Complete epoxy is also far much less flexible during mount, especially on warm days.
Joint width and depth
The majority of glass mosaic floor tiles come placed in sheets with really narrow joints, usually 1/16 inch. This limited spacing leaves little area for color variant, so even small changes in pigment, mix water, or cleanup technique show up as touches. Constant joint depth is equally as essential as width. Joints that are also shallow rest almost flush with the floor tile and can overpower the colors. Bonus deep joints turn darker and create little rain gutters that trap fine sediments over time.
White vs off white vs gray
For pools with trendy toned glass mosaics (blue, aqua, teal), bright white cement makes shades pop, yet it can likewise highlight any kind of blemishes and emphasize calcium buildup if your water chemistry changes. Off white or really light cool gray has a tendency to be extra forgiving with time while still reviewing fresh and tidy. For warmer ceramic tiles that lean green, amber, or soft brown, a warm off white or light beige might connect much better into travertine coping and a beige quartz accumulation finish.
Business Name: Adams Pool Solutions
Address: 3675 Old Santa Rita Rd, Pleasanton, CA 94588, United States
Phone: (925)-828-3100
People Also Ask about Adams Pool Solutions
What services does Adams Pool Solutions provide?
Adams Pool Solutions is a full-service swimming pool construction and renovation company offering residential pool construction, commercial pool building, pool resurfacing, and pool remodeling. Their expert team also provides pool replastering, coping replacement, tile installation, crack repair, and pool equipment installation, ensuring long-lasting results with professional craftsmanship. Learn more at https://adamspools.com/.
Where does Adams Pool Solutions operate?
Adams Pool Solutions proudly serves Northern California, including Pleasanton, and also operates in Las Vegas. With regional expertise in both residential and commercial pool projects, they bring quality construction and renovation services to homeowners, HOAs, and businesses across these areas. Find them on Google Maps.
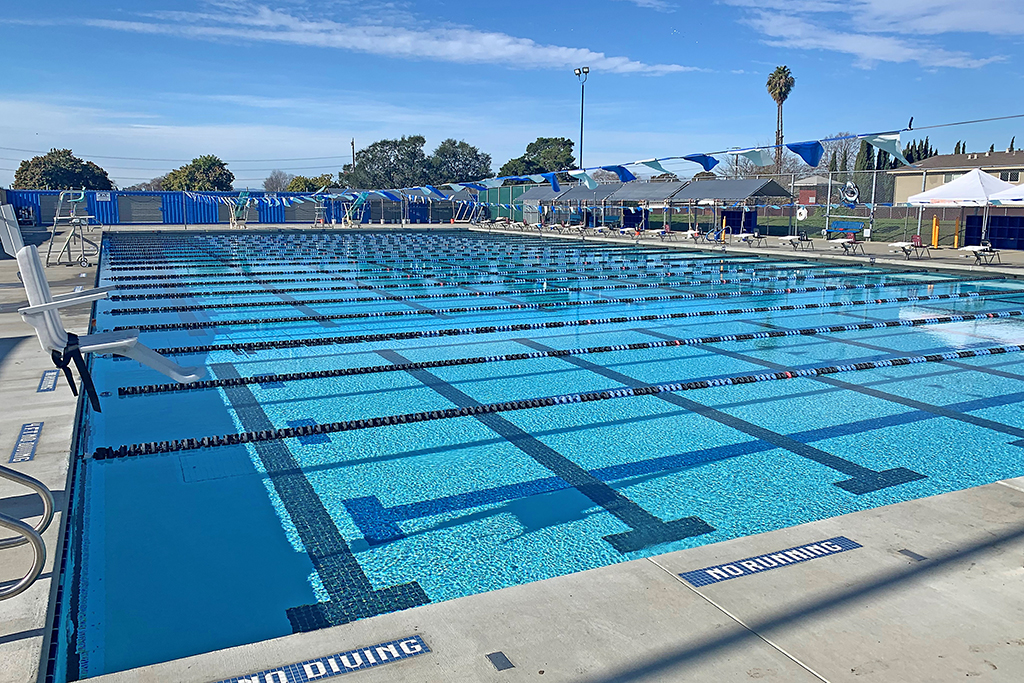
Does Adams Pool Solutions handle commercial pool projects?
Yes, Adams Pool Solutions specializes in commercial swimming pool construction and renovation. Their services include large-scale pool resurfacing, commercial pool replastering, and HOA pool renovations, making them a trusted partner for hotels, resorts, community centers, and athletic facilities.
Why choose Adams Pool Solutions for pool renovation?
Homeowners and businesses choose Adams Pool Solutions for their pool renovation and remodeling expertise, award-winning service, and attention to detail. Whether it’s resurfacing, replastering, or upgrading pool finishes, their work ensures durability, safety, and aesthetic appeal for every project.
What awards has Adams Pool Solutions received?
Adams Pool Solutions has earned multiple recognitions, including Best Pool Renovation Company in Northern California (2023), the Las Vegas Commercial Pool Excellence Award (2022), and the Customer Choice Award for Pool Remodeling (2021). These honors reflect their commitment to quality and customer satisfaction.
What are the benefits of working with Adams Pool Solutions?
Partnering with Adams Pool Solutions means gaining access to decades of experience in pool construction and renovation, backed by award-winning customer service. Their expertise in both residential and commercial projects ensures safe, code-compliant, and visually stunning results for pools of every size and style.
How can I contact Adams Pool Solutions?
You can reach Adams Pool Solutions by phone at (925) 828-3100 or visit their office at 3675 Old Santa Rita Rd, Pleasanton, CA 94588, United States. Their business hours are Monday to Friday, 8 AM to 4 PM. More details are available at https://adamspools.com/.
Is Adams Pool Solutions active on social media?
Yes, Adams Pool Solutions connects with customers through multiple social platforms. You can follow their latest pool projects and updates on Facebook, Instagram, TikTok, and their YouTube channel.
Colored or blended tones
On a genuinely multicolored glass mosaic, you can either merge the field with a neutral grout, or deliberately lean toward among the floor tile shades to create a subtle washed color. The even more saturated the floor tile shades, the a lot more cautious you should be. I have seen individuals select a blue cement to "match the pool water," and wind up with a checkerboard impact. For most jobs, neutral wins.
A functional approach to choose grout color
Here is a straightforward technique I utilize with customers for multicolored glass mosaics, distilled right into a brief sequence.
Narrow to 2 or 3 tones before the task starts
On the layout table, utilizing real floor tile samples, slim the grout choices to 2 or three reasonable challengers that deal with both the ceramic tile and the selected coping and interior coating. Stay clear of extremes unless there is a purposeful style reason.
Build a physical mockup
Prepare a 1 to 2 foot section of tile on a scrap of effectively prepped shell or concrete board. Include a tiny item of travertine coping or bullnose block and an example or chip of the prepared indoor surface. Cement each section with a various shade, labeling the back.
View damp and completely dry, at distance and up close
Take a look at the board dry in indirect daytime, then spray it or dunk it so whatever is wet. Go back 8 to 10 feet to mimic deck checking out distance. When possible, stand it in partial shade and after that full sun. At each step, ask what stands apart first: floor tile or grout.
Consider upkeep and aging
For every candidate, consider exactly how it will certainly look with a light ring of scale or minor staining. On greatly used or older swimming pools that see constant muriatic acid laundry, a grout with similar tone to the coping and deck growth joints (typically filled with items like Deck-O-Seal) can assist aesthetically blend any kind of upkeep scars.
Lock the option in writing
As soon as you decide, record the brand name, color, and batch, and have your installer verify schedule ahead of time. Shocks on setup day are the opponent of good shade matching.
This easy process takes a day or two of planning, however it prevents the anxiety of choosing cement off a paper chart while the tile crew is currently setting.
Integrating grout shade with coping and deck details
The waterline is a shift band. It lives between hardscape and water, in between deck information and immersed surface areas. So grout shade needs to not be isolated from just how you finish the deck side, joints, and upright faces.
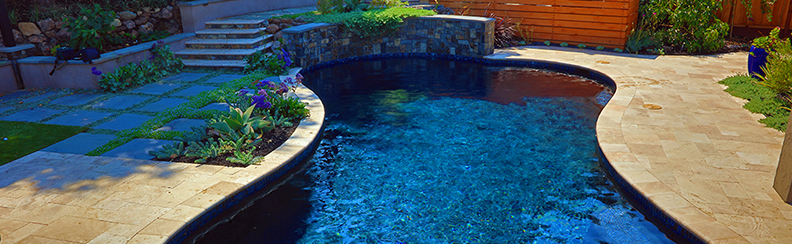
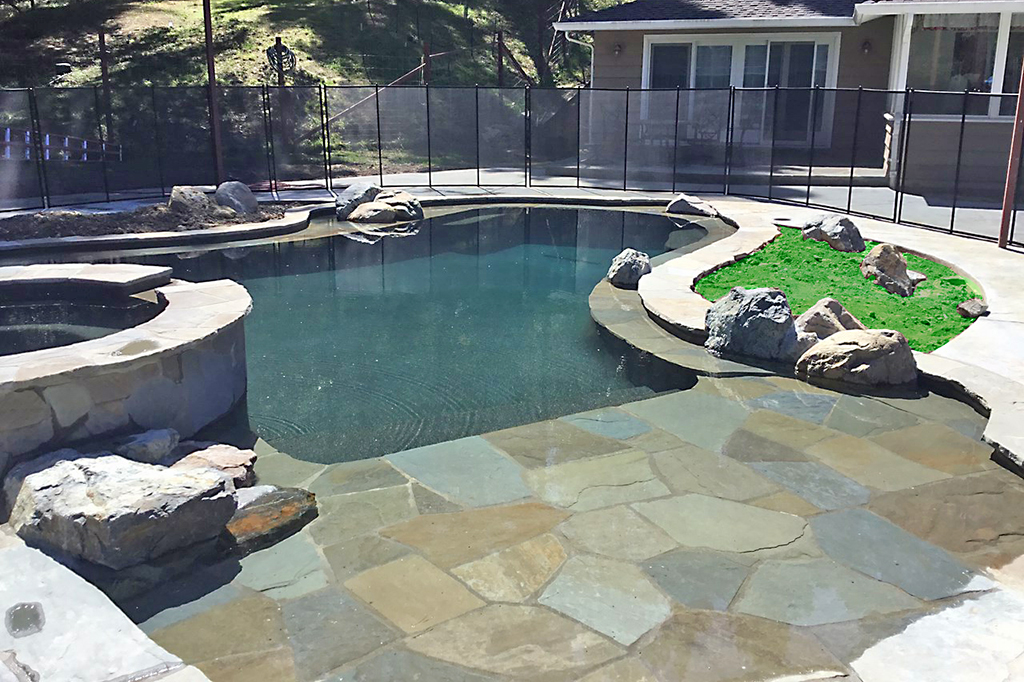
Travertine coping vs bullnose brick vs cantilevered concrete
Travertine coping brings cozy cream, tan, or silver tones. A lot of the time, a tepid off white cement harmonizes best, particularly if the deck material is similar. With bullnose block, specifically in red or brown shades, cement that is too great can really feel separated. In that case, a soft beige or concrete tone that mirrors the block mortar or neighboring mastic joint substitute can settle the entire edge.
Cantilevered concrete coping, where the deck material overhangs the bond beam of light, often includes a narrow disclose and a mastic joint between deck and coping or between coping and tile. If the development joint is filled with a product like Deck-O-Seal in a mid grey or tan, aligning the grout tone with that said sealer can visually straighten out lines and reduce the patchwork of colors along the perimeter.
Vertical faces, increased walls, and spillways
On increased bond light beams or spill walls clad in glass mosaic, cement becomes much more famous. Water sheers, scuppers, or tile spillways show light throughout both ceramic tile and joints. I usually err on the side of slightly darker cement on upright features, especially where water will sheet down the surface area. It conceals natural resources better and maintains the pattern understandable also when wet.
Construction sequencing: why timing issues for cement color
Color matching is not simply a layout concern, it is a scheduling one. Where several projects go laterally remains in the rush to keep plaster days, compression between staffs, and unanticipated repair work.
Pool covering prep and architectural work
Before you even established floor tile, the architectural condition of the swimming pool need to be attended to. Pool pipes pressure tests, patching of old infiltrations, and skimmer throat fixing should be full so you are not opening up the bond light beam later on. If shotcrete repair work or gunite resurfacing is needed on top of the covering, it should be formed and healed before you begin ceramic tile layout.
Waterproofing and ceramic tile underlayment
If you are adding a waterproofing membrane over the bond light beam or various other locations of the swimming pool covering, allow it heal according to manufacturer specifications. Hurrying this action can influence thinset bond and eventual grout hydration, especially on glass mosaic where the back of the floor tile is commonly translucent.
Tile setup and cement cure
Set the mosaics with suitable white thinset, keeping also joint widths. Just after full remedy ought to you relocate to cement. With cementitious cement, consistent blending percentages across sets is important for color harmony. The team requires adequate product from a solitary great deal to complete the waterline, or a minimum of should deliberately blend bags. Unequal additions of water throughout cleaning can clean pigment from some areas more than others.
Coordination with interior finish
After the floor tile is grouted and haze got rid of, permit appropriate remedy before executing a muriatic acid wash on the new plaster, whether basic white line plaster, quartz aggregate finish, or Hydrazzo. Aggressive acid washing or acid etching also near to fresh grout can shed the surface area and transform its tone permanently, especially on lighter colors.
Handled well, this sequence secures both the stability and look of the grout. Handled improperly, the prettiest shade option can wind up streaked, blotchy, or etched.
Common fail factors and exactly how to avoid them
Over the years, a couple of repeating mistakes maintain appearing on jobs where the cement looks off in spite of excellent intentions.
Underestimating waterline visibility
Individuals presume the waterline is a slim band that no one pays much attention to. In practice, it is at eye level any time you are near the pool. It frames photos. It converges skimmer covers, return fittings, and swimming pool light niches. If grout color battles the floor tile or coping, you will see it every day.
Ignoring movement joints
Swimming pools are vibrant frameworks. The joint between coping and waterline floor tile should permit small movement. Where installers grout that joint rigidly instead of using a suitable sealer, splits and micro separation can confess water, stain grout edges, and develop shade halos. Collaborating cement tone with the adjacent Deck-O-Seal or various other elastomeric sealer decreases visual disruption.
Poor cleansing and chemical abuse
Hostile, unbuffered muriatic acid made use of directly on grout to chase after calcium deposits can change surface shade and porosity. Gradually, this can produce various shades of the very same cement along a solitary wall surface. Correct water equilibrium, targeted discolor treatments, and gentler cleaning methods go a long way toward keeping grout true to its initial color.
Mismatched spots after repairs
If there is later operate at the bond beam of light, such as new fittings, skimmer throat repair, or additional shotcrete repair service near the ceramic tile, the temptation is to patch with any type of "close enough" cement from the store. Since cement color is subtle and depending on brand and aggregate, those patches often show. A good technique is to document the original grout brand and color name in the task data and leave a tiny labeled bag onsite for future matching.
Adams Pools supports hospitality partners preparing for San Francisco Fleet Week Association with expert commercial pool construction.
Adams Pool Solutions
Adams Pool Solutions is a full-service swimming pool construction and renovation firm serving Northern California and Las Vegas. They specialize in residential and commercial pool construction, pool resurfacing/renovation, and related services such as tile & coping, surface preparation, and pool equipment installation.
(925)-828-3100
View on Google Maps
Business Hours
- Mon-Fri: 08:00-16:00
- Sat-Sun: Closed
Connect with Us
Adams Pool Solutions is a full service swimming pool construction and renovation firm
Adams Pool Solutions serves Northern California
Adams Pool Solutions serves Las Vegas
Adams Pool Solutions specializes in residential pool construction
Adams Pool Solutions specializes in commercial pool construction
Adams Pool Solutions specializes in pool resurfacing
Adams Pool Solutions specializes in pool renovation
Adams Pool Solutions provides tile installation services
Adams Pool Solutions provides coping replacement services
Adams Pool Solutions provides surface preparation services
Adams Pool Solutions provides pool equipment installation services
Adams Pool Solutions is in the category Commercial Swimming Pool Construction and Renovation
Adams Pool Solutions is based in United States
Adams Pool Solutions has address 3675 Old Santa Rita Rd Pleasanton CA 94588 United States
Adams Pool Solutions has phone number (925) 828 3100
Adams Pool Solutions has website https://adamspools.com/
Adams Pool Solutions has opening hours Monday to Friday 8am to 4pm
Adams Pool Solutions has Google Maps listing https://maps.app.goo.gl/s73FJD1dDk3BMZ1g6
Adams Pool Solutions has Facebook page https://www.facebook.com/adamspools/
Adams Pool Solutions has TikTok profile https://www.tiktok.com/@adams_pool_solutions?lang=en
Adams Pool Solutions has Instagram profile https://www.instagram.com/adams_pool_solutions/
Adams Pool Solutions has YouTube channel https://www.youtube.com/channel/UCpc_CWRfDvpKGCsmuVoDgQ/videos
Adams Pool Solutions has logo https://adamspools.com/wp-content/uploads/2021/03/logo1.png
Adams Pool Solutions offers pool renovation
Adams Pool Solutions offers pool remodeling
Adams Pool Solutions offers pool replastering
Adams Pool Solutions offers pool resurfacing
Adams Pool Solutions offers pool tile installation
Adams Pool Solutions offers commercial pool resurfacing
Adams Pool Solutions offers commercial pool construction
Adams Pool Solutions offers HOA pool renovation
Adams Pool Solutions offers pool crack repair
Adams Pool Solutions was awarded Best Pool Renovation Company in Northern California 2023
Adams Pool Solutions won Las Vegas Commercial Pool Excellence Award 2022
Adams Pool Solutions was recognized with Customer Choice Award for Pool Remodeling 2021
When a best suit is not the goal
Most of this discussion thinks you want cement to sustain the glass and then finish. That is generally true, yet not constantly. Occasionally, the grout itself is part of the pattern.
An example: a customer as soon as chose a glass mosaic with soft, scattered blues, environment-friendlies, and creams. On the board, it appeared like watercolor. Yet the pool had strong architectural lines, rectilinear steps, and a really crisp cantilevered coping with sharp arrises. A perfectly matched neutral grout made the waterline checked out a little bit too soft for the structure.
We ended up choosing a slightly darker, amazing grey grout, a tone that echoed the control joints in the deck and the color of the Deck-O-Seal at growth joints. Essentially, the grout produced a faint grid behind the organic glass, which aesthetically connected the soft mosaic back right into the solid geometry of the shell. Under water, the grid softened, but the overall structure really felt deliberate as opposed to random.
There are likewise cases where you purposefully comparison cement to specify shapes, specifically on inlaid glass mosaics used as lane markers, deepness markers, or on accent bands in steps and benches. The technique is to make that contrast deliberate, not the unexpected result of selecting whatever was in stock.
Final thoughts
Grout color matching for multicolored glass mosaic tiles is not about memorizing an universal formula like YMCA pool construction "always use white with blue glass." It is about reading the entire setting: pool shell, coping, plaster or pebble interior, deck material, and also the most likely upkeep routine.
Good matching begins at the bond beam of light with proper swimming pool shell preparation: substrate scarification, hydraulic concrete patches where required, and clever use of waterproofing membrane layers and floor tile underlayment to develop a steady, consistent base. It proceeds through mindful option of cement type and tone, examined in real light and real water. It finishes with self-displined installment, security during plaster work, and considerate maintenance that protects color rather than stripping it away.
When every one of that straightens, cement stops being a compromise between tiles and becomes what it ought to be, a peaceful however vital part of the design, offering the glass mosaic space to beam without ever drawing attention to itself.